
Test day in the LAB.
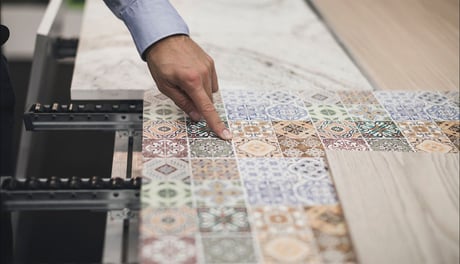
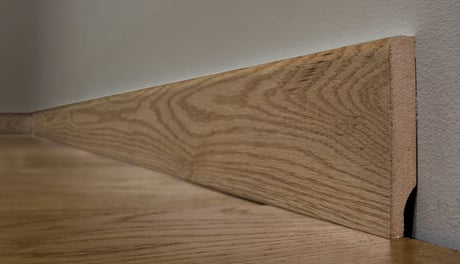
Substrate: CABINET DOOR, shaped, FOR LAMINATED PVC KITCHEN
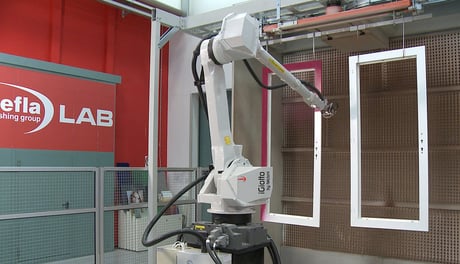
Machines used: SmartSand - iBotic - Aquadry - UV-R
Preparation
LAB tests have been exciting, challenging events for over 20 years. There is a lot of preparation involved, both due to customer expectations and to make sure that the same line conditions requested by the customer are actually recreated. On the actual day of the test with the customer - an activity that we hope to be able to resume in a live format as soon as possible, and with which we have already experimented digitally earlier year - these operations will be preceded by a short briefing session, upon the customer's arrival at Cefla Finishing, to bring all the professionals involved up to speed, from sales to technical experts.
We bring all the equipment that will be needed for finishing checks near the machine - including scales and various instruments such as a pyrometer, cross cut, UV Map and glossmeter, to name just the main ones.
After setting up the work area near the machines, with all the necessary precautions and considering the layout of the line, it is time to decide how the test will be carried out. From starting up the machine, to defining the various manual operations on the machine - such as movement of the axes and opening of the guns. Some customers love to watch these operations and, intrigued by the skilful, knowledgeable actions of us technicians, already ask their first questions, while others prefer to patiently wait instead for the first coated piece out of the line.
Working recipe for shaped door cabinet
Then it's time to choose the work recipe, that is, the programming of a sequence of tasks and activities: how the robot must operate, and what it will have perform on the workpieces.
This is where experience comes into play and the following steps, among others, are decided:
- processing of the piece edge, working speed, required nozzle distance from the edge
- embossed part machining, speed, distance
- flat panel machining, type of working trajectory (x or y), distance
Each recipe created refers to a specific product and, to use the recipe, it is enough to activate it before starting the cycle and feeding the workpiece. The different configurable recipes are always linked to the type of workpiece or to the coating cycle (primer or finish).
An overview
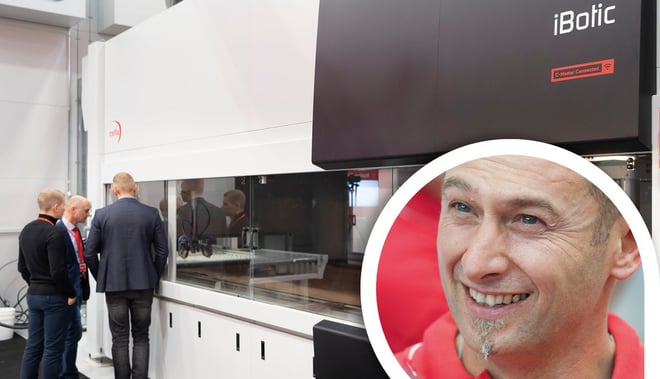
It is not time to start yet: first, the machine as a whole must be examined. In the case of iBotic, we are faced with a high-performing system of considerable industrial complexity, starting with the filtration system with water curtains and a turret for the removal of paint particles, called the "Scrubber", and ending with the "Skimmer Big Bag" , where the separation of solid residues from water takes place (aided by flocculating additives), all the way to the spraying equipment, including spray-gun support arms, with live testing of how easy it is to replace the arm, the type of guns and the number of circuits etc.. We then install the nozzles and prepare the paint for loading to the machine.
Start of sanding operations
We are ready for the first sanding operation of our shaped cabinet door with Smartsand, to then go back to iBotic and carry out our first UV White Primer application. After the usual weight check (130 gr/m2) a test door is fed through.
The right coverage
It is now time for the first inspection by the customer who checks the right coating coverage and, as far as the edges are concerned, also checks the quantity. Edges are vertical, therefore the biggest risk is dripping - a defect mainly linked to the thickness of the paint coat applied, or, in certain cases, also to the product formulation.
Flash-off and drying
The whole cycle is run and supervised starting from the very first shaped door: the workpiece now enters the oven (Aquadry) for flash-off, i.e. the evaporation of the solvent component.
These products require approximately 8 minutes.
The next step is the UV-R oven and since this is a pigmented coat, a first gallium lamp followed by a second mercury lamp are needed for drying.
Visual assessment and tactile inspection
At the outlet from the UV-R oven, a first (visual) assessment of the workpiece is carried out, looking for any pitting, edge pulling and halos.
The next step is a tactile inspection to verify drying. I am sure you are aware of the typical gesture of tapping the coat film with your fingernail to check its hardness and adhesion? I am referring to exactly that.
Action parameters as may be required
If problems are encountered, appropriate corrections are made by adjusting the various parameters involved:
- changing the product formulation
- changing machine parameters such as speed, product/air pressures, gun height, number or type of strokes,
- adjustment of flash-off parameters (air speed, air temperature, hold times)
- changing drying parameters (number of lamps, lamp power).
Successful outcome of the checks: all the pieces can be coated
All OK! We can now coat all the workpieces with the primer, before moving on to the next phase of mixed (automatic an manual) sanding, typical of shaped items.
The customer has several different types of paint and shades. Once mixed, we load them to the machine following the same procedures used for the primer.
Other evaluations
At the outlet from the UV-R oven, other evaluations are performed, such as an appreciation of the degree of finish in all its parts (flat part, embossed part and edges) and checks with the glossmeter to verify that the degree of opacity is in line with the customer's brief.
Machine cleanness is also a plus
Once paint finishing is completed, we usually clean the machine, showing the right procedure to the customer.
Final debriefing and test report
The test often ends with a final debrief meeting to discuss the results obtained and any changes to be introduced, for example, in the initial layout. At the end of the day, everything is duly reported in a report compiled by us technicians and in which we describe in detail the work performed, to ensure the most efficient task sharing between the Sales Manager, Sales Engineering, Lay out adjustment, and Service (which will use it mainly during the start-up phase).